

Ordering a Virtual Server
After registration and logging into your account, you can order a virtual server in just a few steps.
Step 1. Go to the server section
Section titled “Step 1. Go to the server section”Open:
Products/Services → Virtual Servers
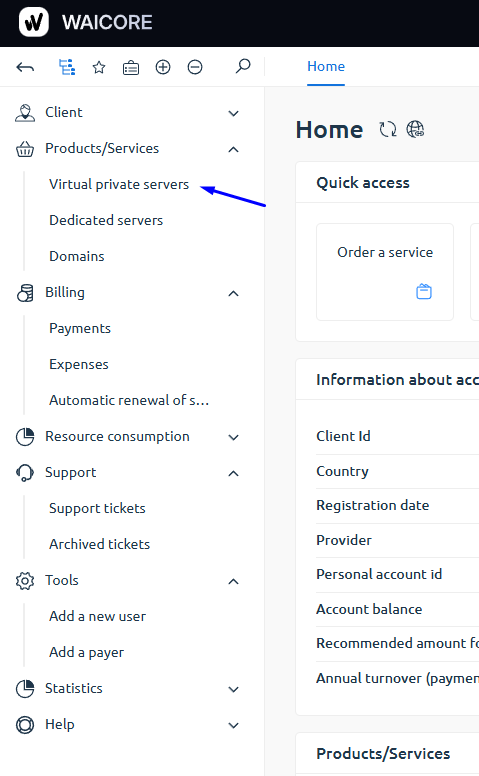
Step 2. Click “Order”
Section titled “Step 2. Click “Order””At the top of the page click:
➕ Order
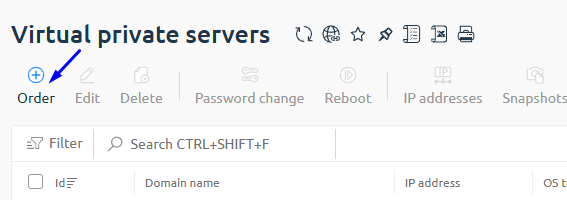
Step 3. Select a data center
Section titled “Step 3. Select a data center”Choose a location, for example:

Germany, Frankfurt

Finland, Helsinki
Click Select

Step 4. Choose a plan
Section titled “Step 4. Choose a plan”Select a suitable server plan.
Example:
- EP-1
- EP-2
- EP-3
Click: Order
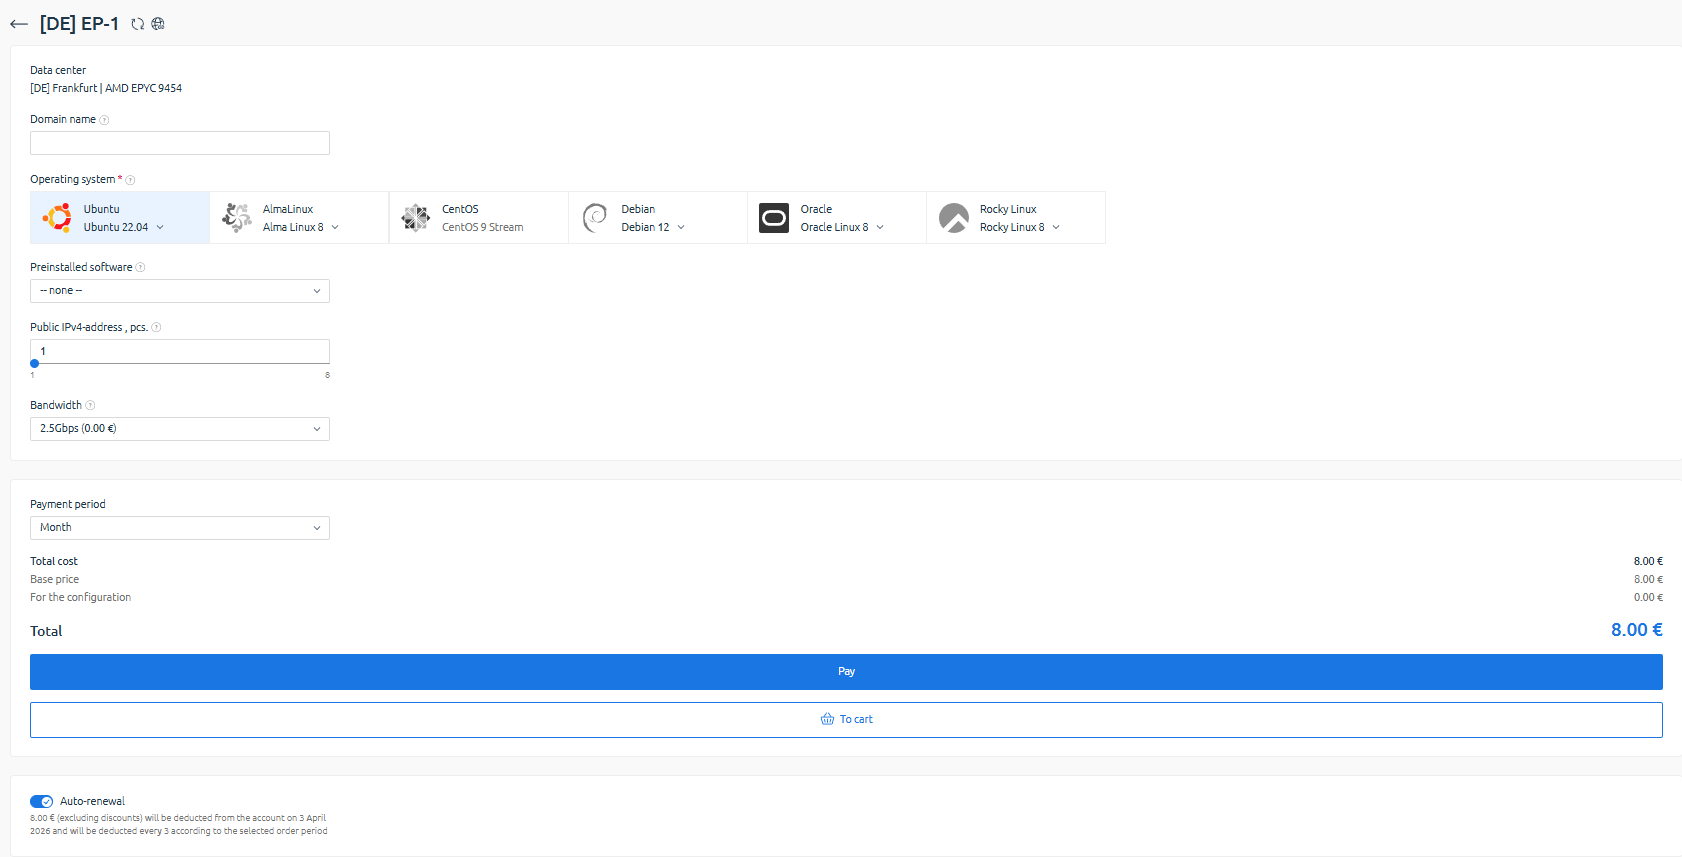
Step 5. Configure the server
Section titled “Step 5. Configure the server”Specify:
- Domain name (PTR record)
- Operating system (Ubuntu, Debian, AlmaLinux, etc.)
- Preinstalled software if required
- Number of IPv4 addresses
- Port speed
- Billing period
- Auto-renewal
You can add the server to the cart or pay immediately.
Step 6. Review the order
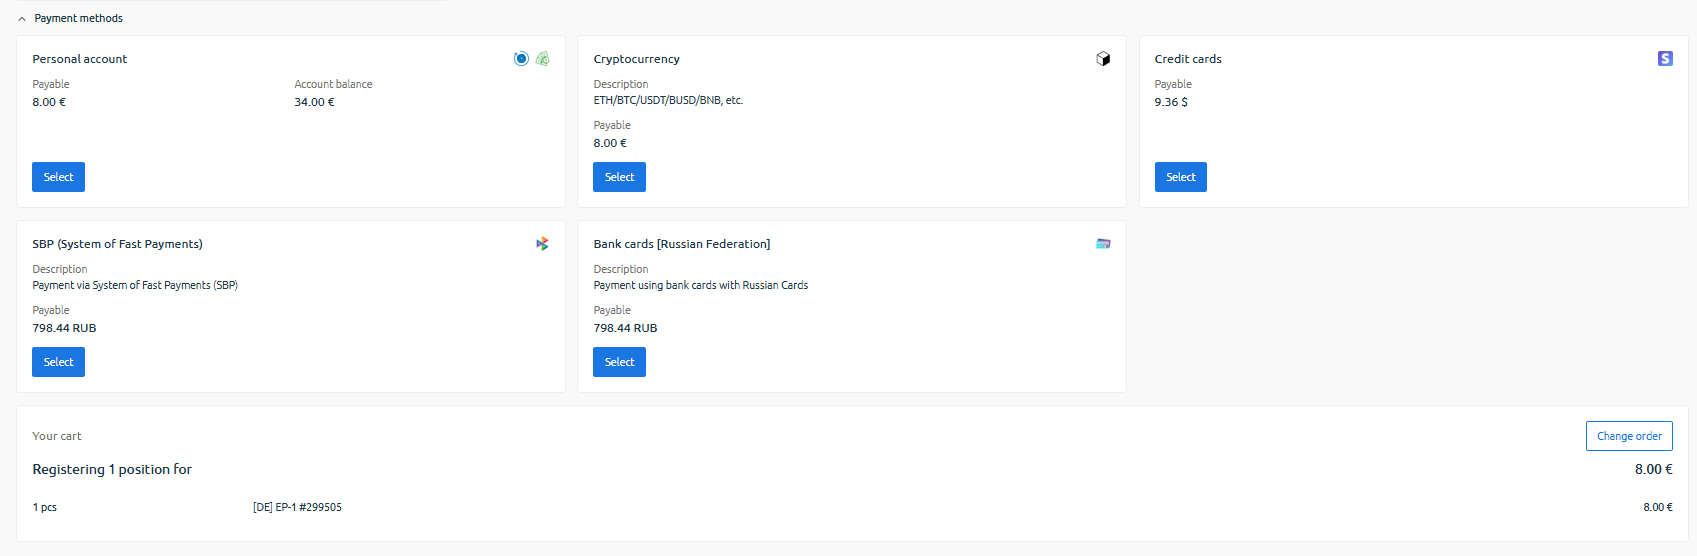
Section titled “Step 6. Review the order”Verify the order and choose a convenient payment method.
If you have a promo code, you can enter it here.
Available payment methods:
- Account balance
- Cryptocurrency
- Bank cards (Russia & International)
- SBP
Click Select and Proceed to payment
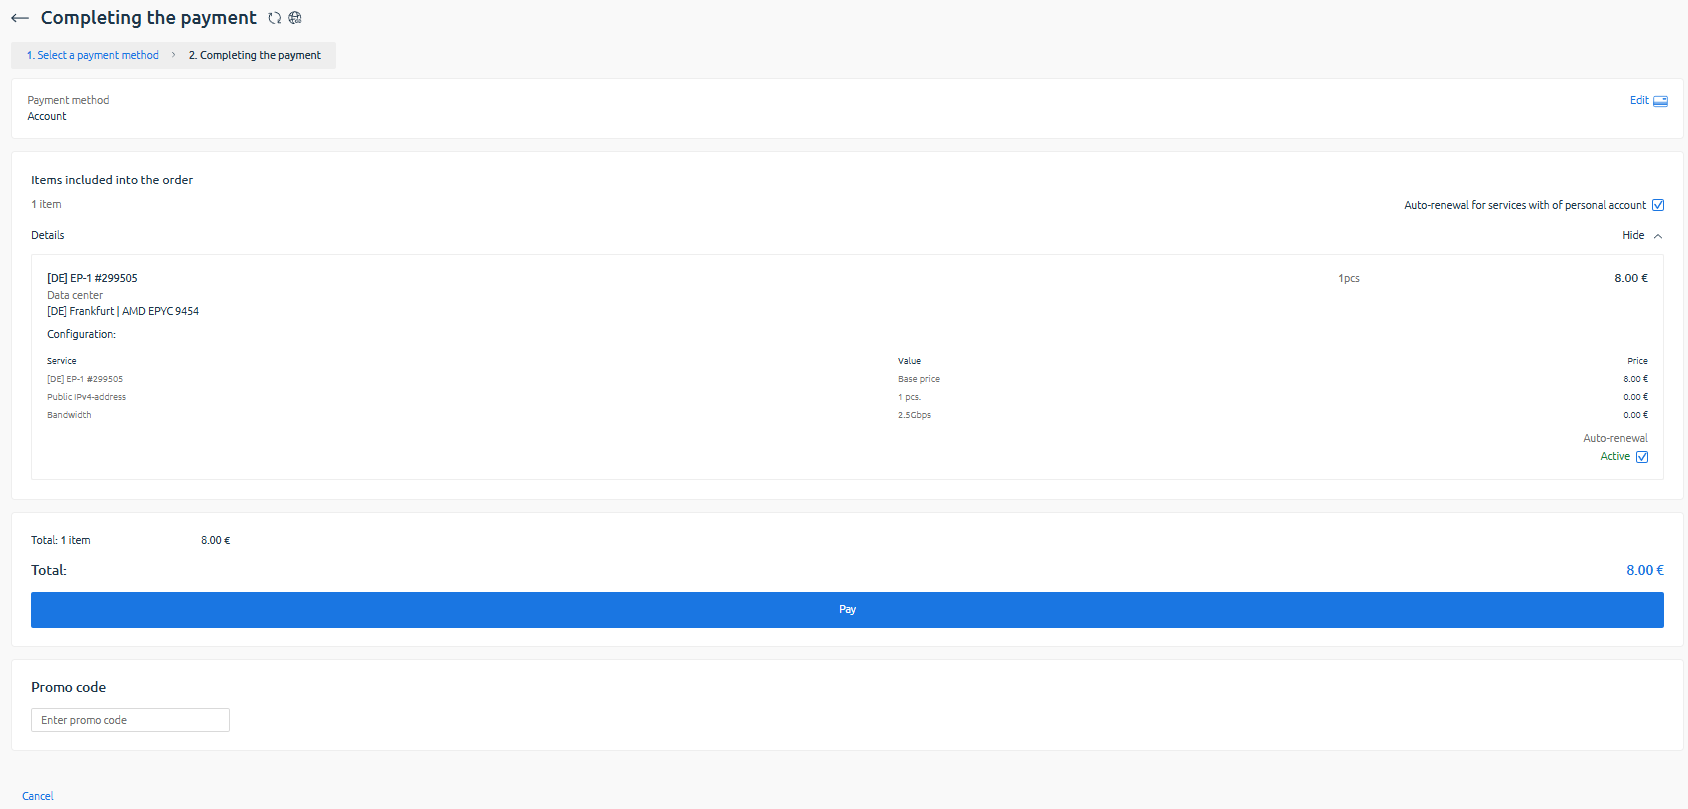
After payment, the server will appear in the “Virtual/Dedicated Servers” menu.
🎉 Done! Your VPS has been successfully ordered.