

Uptime Kuma
Uptime Kuma is best deployed on a separate virtual machine and configured right away for your checks.
In this guide, we will:
- install Uptime Kuma using the VM script;
- choose the database type;
- create an administrator account;
- add the first availability monitor.
Installing Uptime Kuma
Section titled “Installing Uptime Kuma”Step 1. Start the installation on the VM
Section titled “Step 1. Start the installation on the VM”Open the virtual machine management panel and choose the Uptime Kuma script.
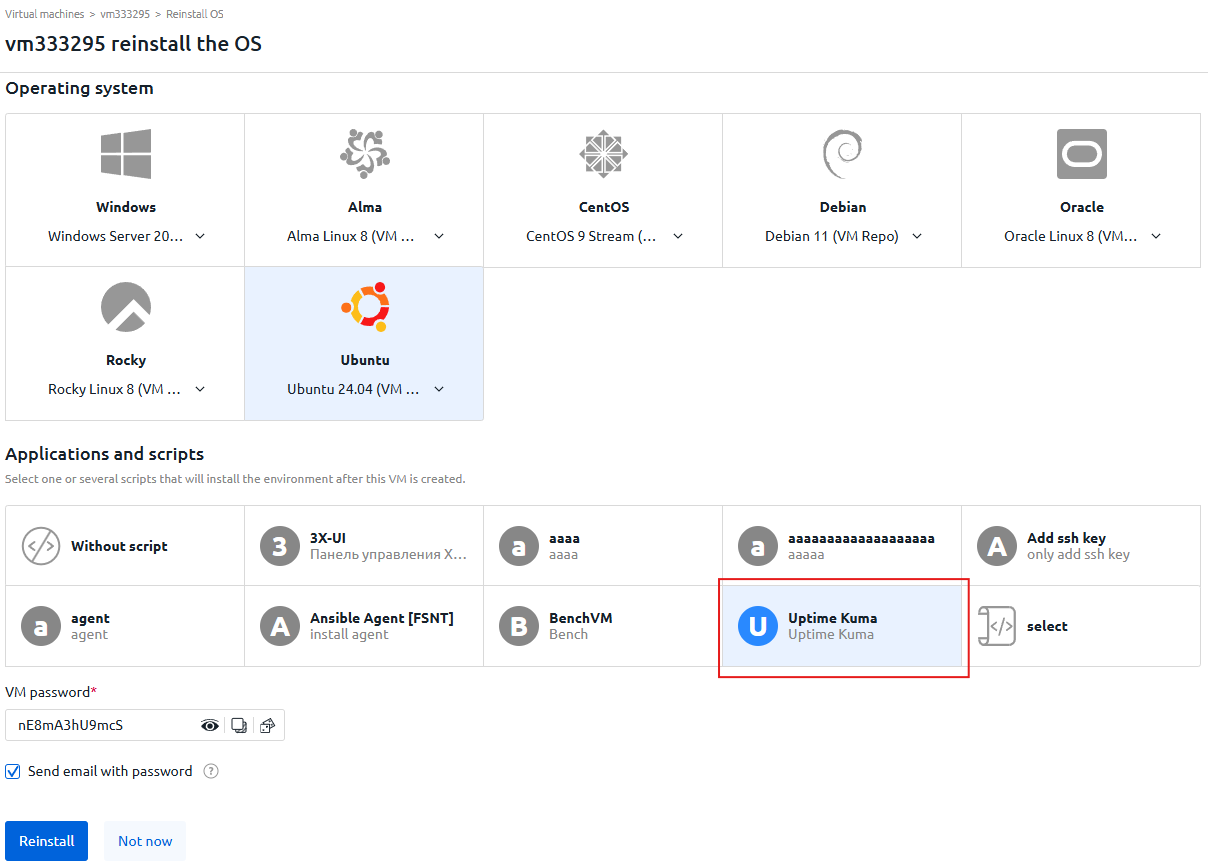
Step 2. Wait for the installation to finish
Section titled “Step 2. Wait for the installation to finish”After the script starts, wait for the installation to complete successfully.

Step 3. Open the control panel
Section titled “Step 3. Open the control panel”Open Uptime Kuma in your browser at:
http://{IP}:3001Initial setup
Section titled “Initial setup”Step 1. Choose the database type
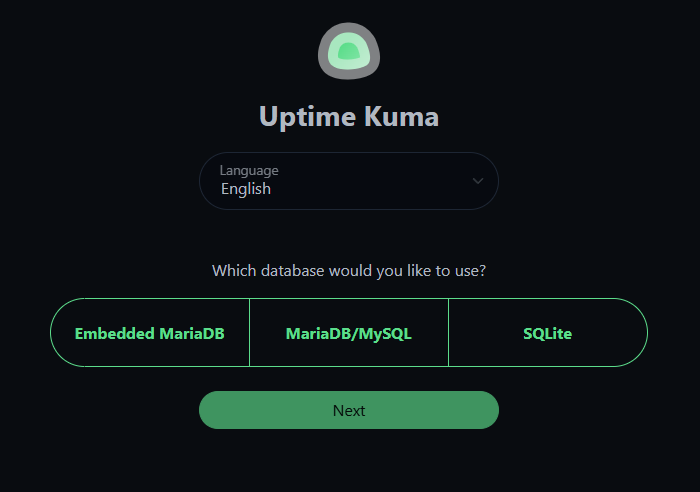
Section titled “Step 1. Choose the database type”On the first Uptime Kuma screen, choose how the database should be stored.
For most installations, SQLite is the simplest option.
Step 2. Create an administrator
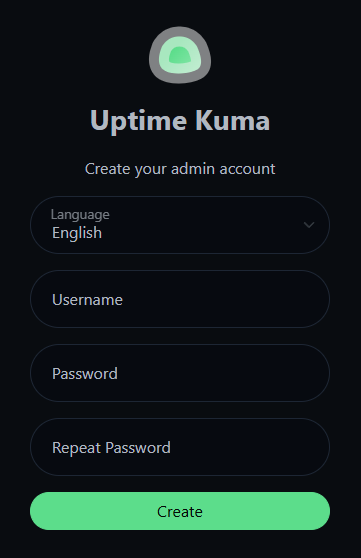
Section titled “Step 2. Create an administrator”Set the administrator login and password, then complete the account creation.
Step 3. Open the main dashboard
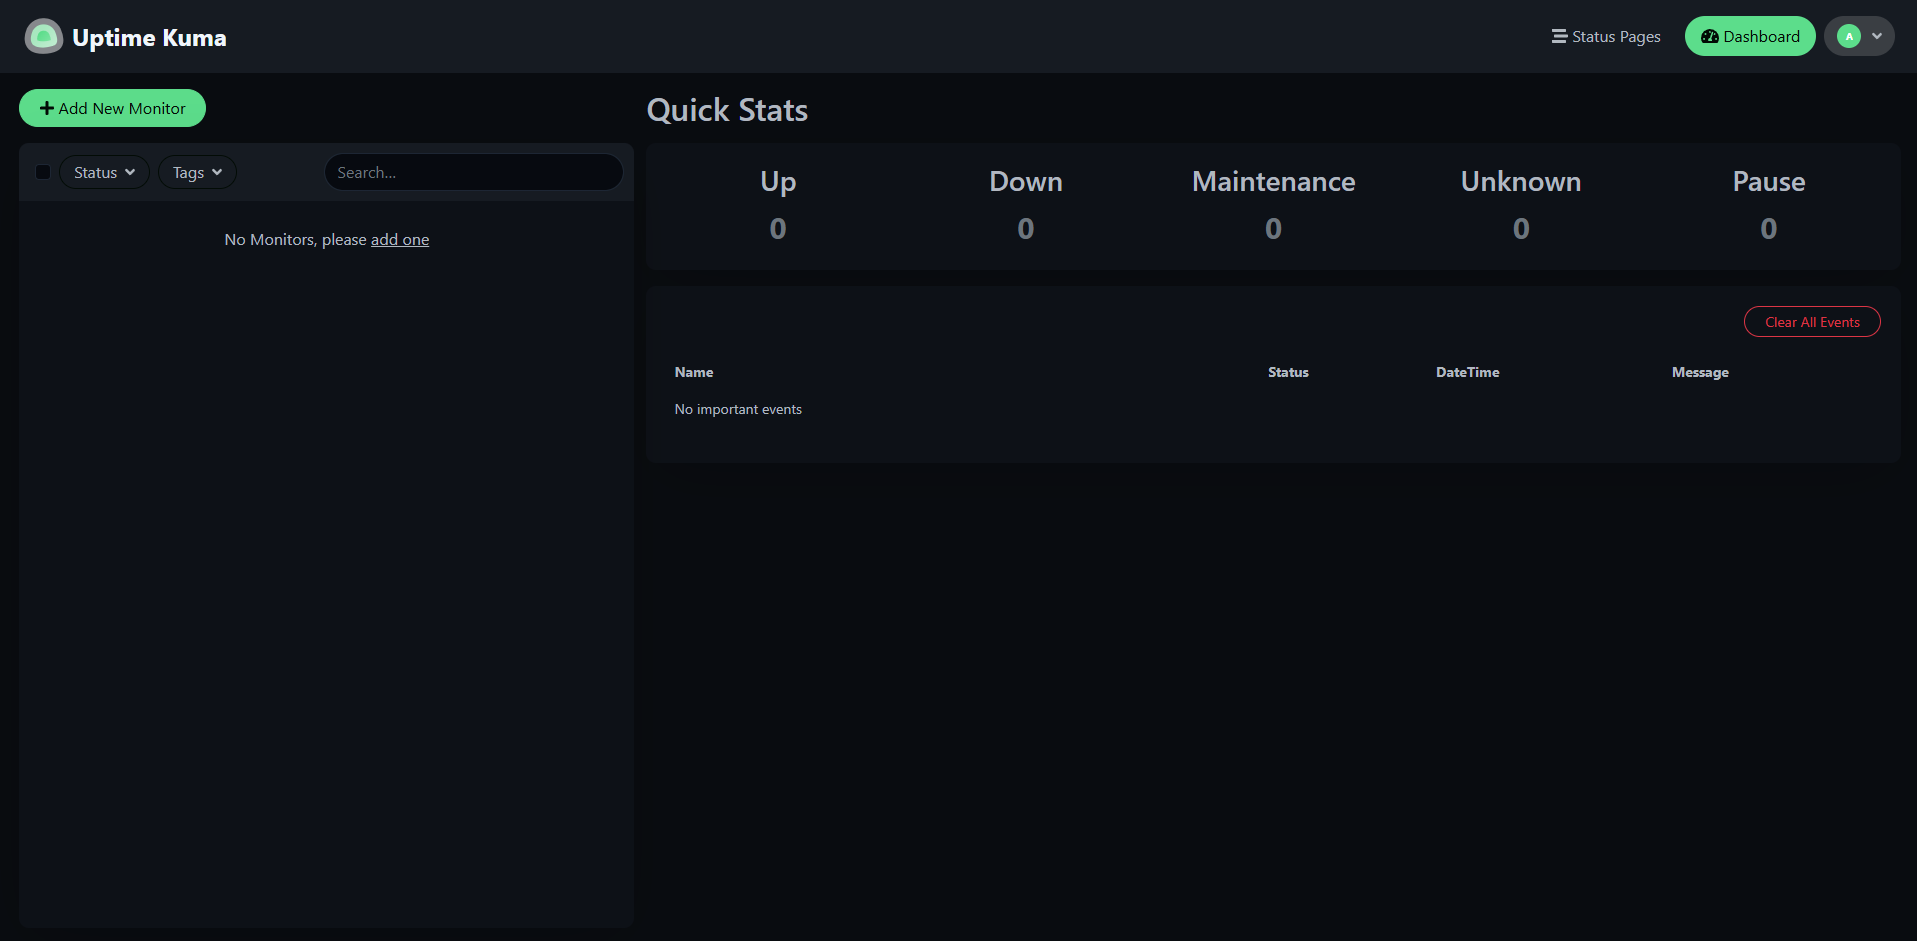
Section titled “Step 3. Open the main dashboard”After signing in, you will see the main Uptime Kuma dashboard.
This is where all monitors and their status are shown.
Adding the first monitor
Section titled “Adding the first monitor”Step 1. Create a new monitor
Section titled “Step 1. Create a new monitor”Click the New Monitor button.
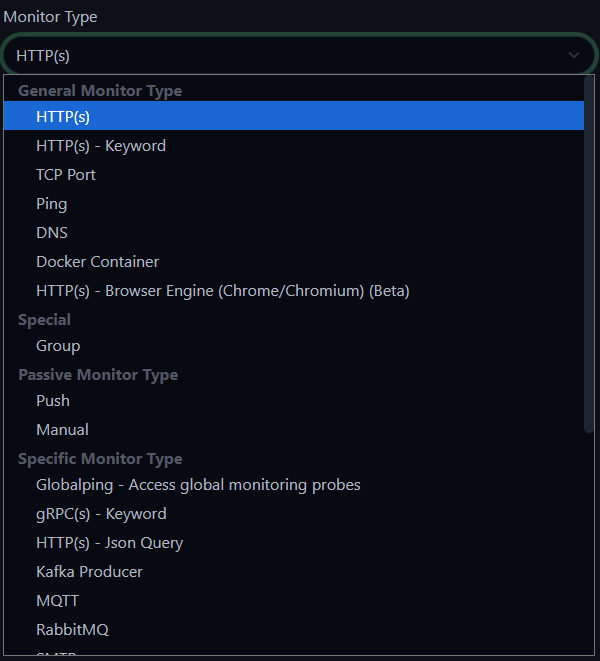
Step 2. Choose the monitor type
Section titled “Step 2. Choose the monitor type”For DNS or website availability checks, choose the appropriate type, for example Ping.
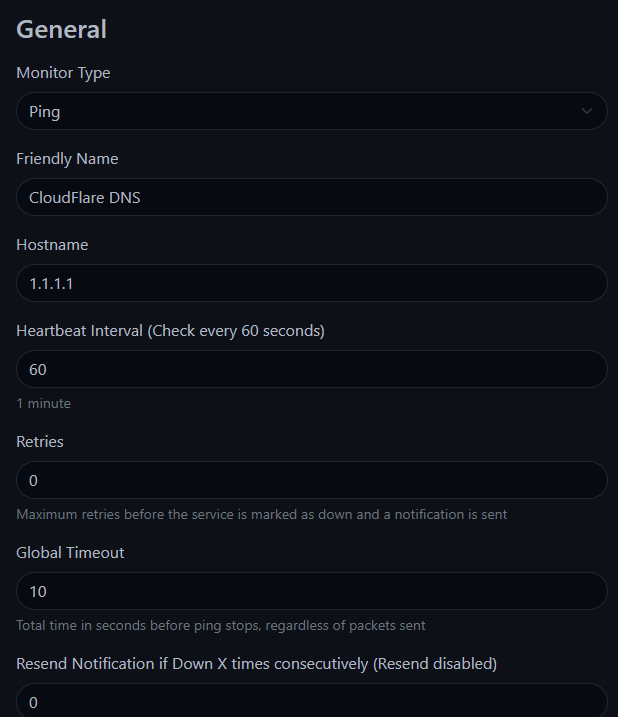
Step 3. Fill in the monitor settings
Section titled “Step 3. Fill in the monitor settings”Enter the name, target address, and other parameters, then save the settings.
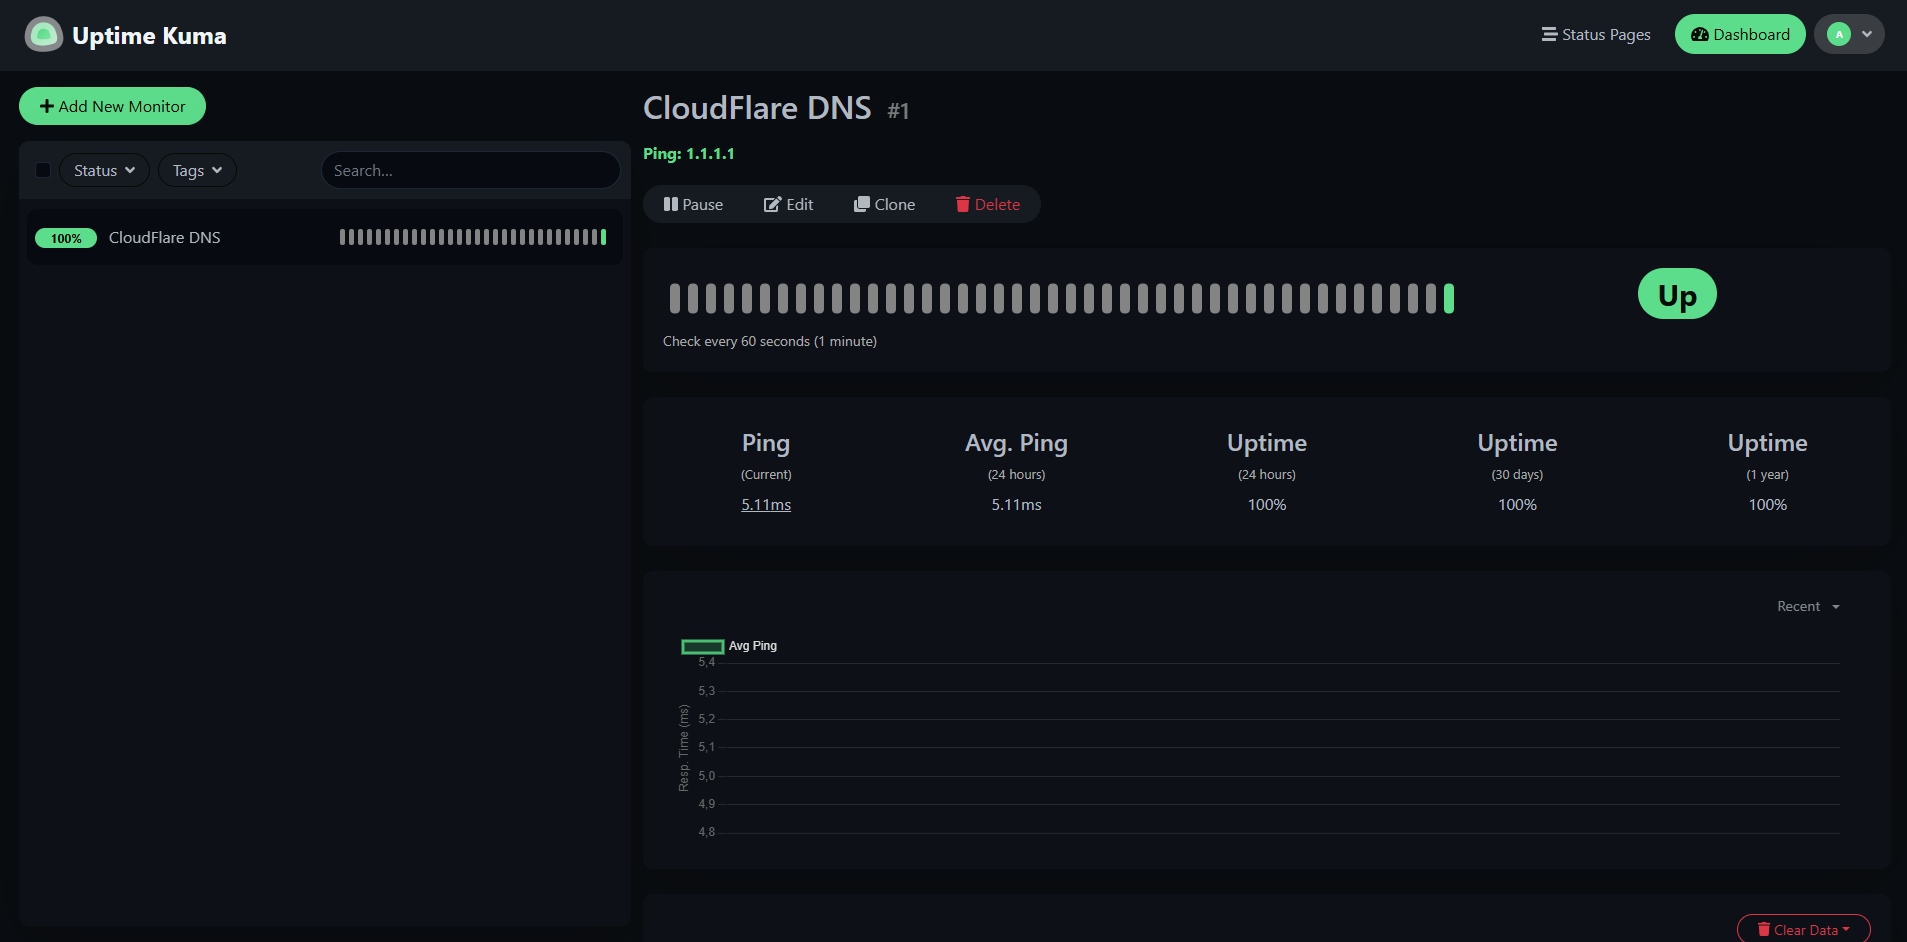
Step 4. Verify the result
Section titled “Step 4. Verify the result”After saving, the monitor will appear in the list and its status will start updating.
For Cloudflare DNS or another public service, choose the check type that matches your use case.
Done. Uptime Kuma is installed and ready to use.